Posted in: Animal Sightings, Exploring Kentucky, Food, Hiking, Parks, Sightseeing, YouTube Video Link

Experiencing Red River Gorge

It seems crazy the number of things in a three-hour radius from our home that we have not gone to yet. One of these was the Red River Gorge. We know people who had gone, people who had loved it, but we had never been there. As part of our quick summer vacation, we decided to stay a couple of days and see the Gorge.

One of the nice things about Red River Gorge is that is free to enter. There are of course things to spend your money on: local stores, souvenirs, the Sky Bridge, and adventures like rock climbing or kayaking.

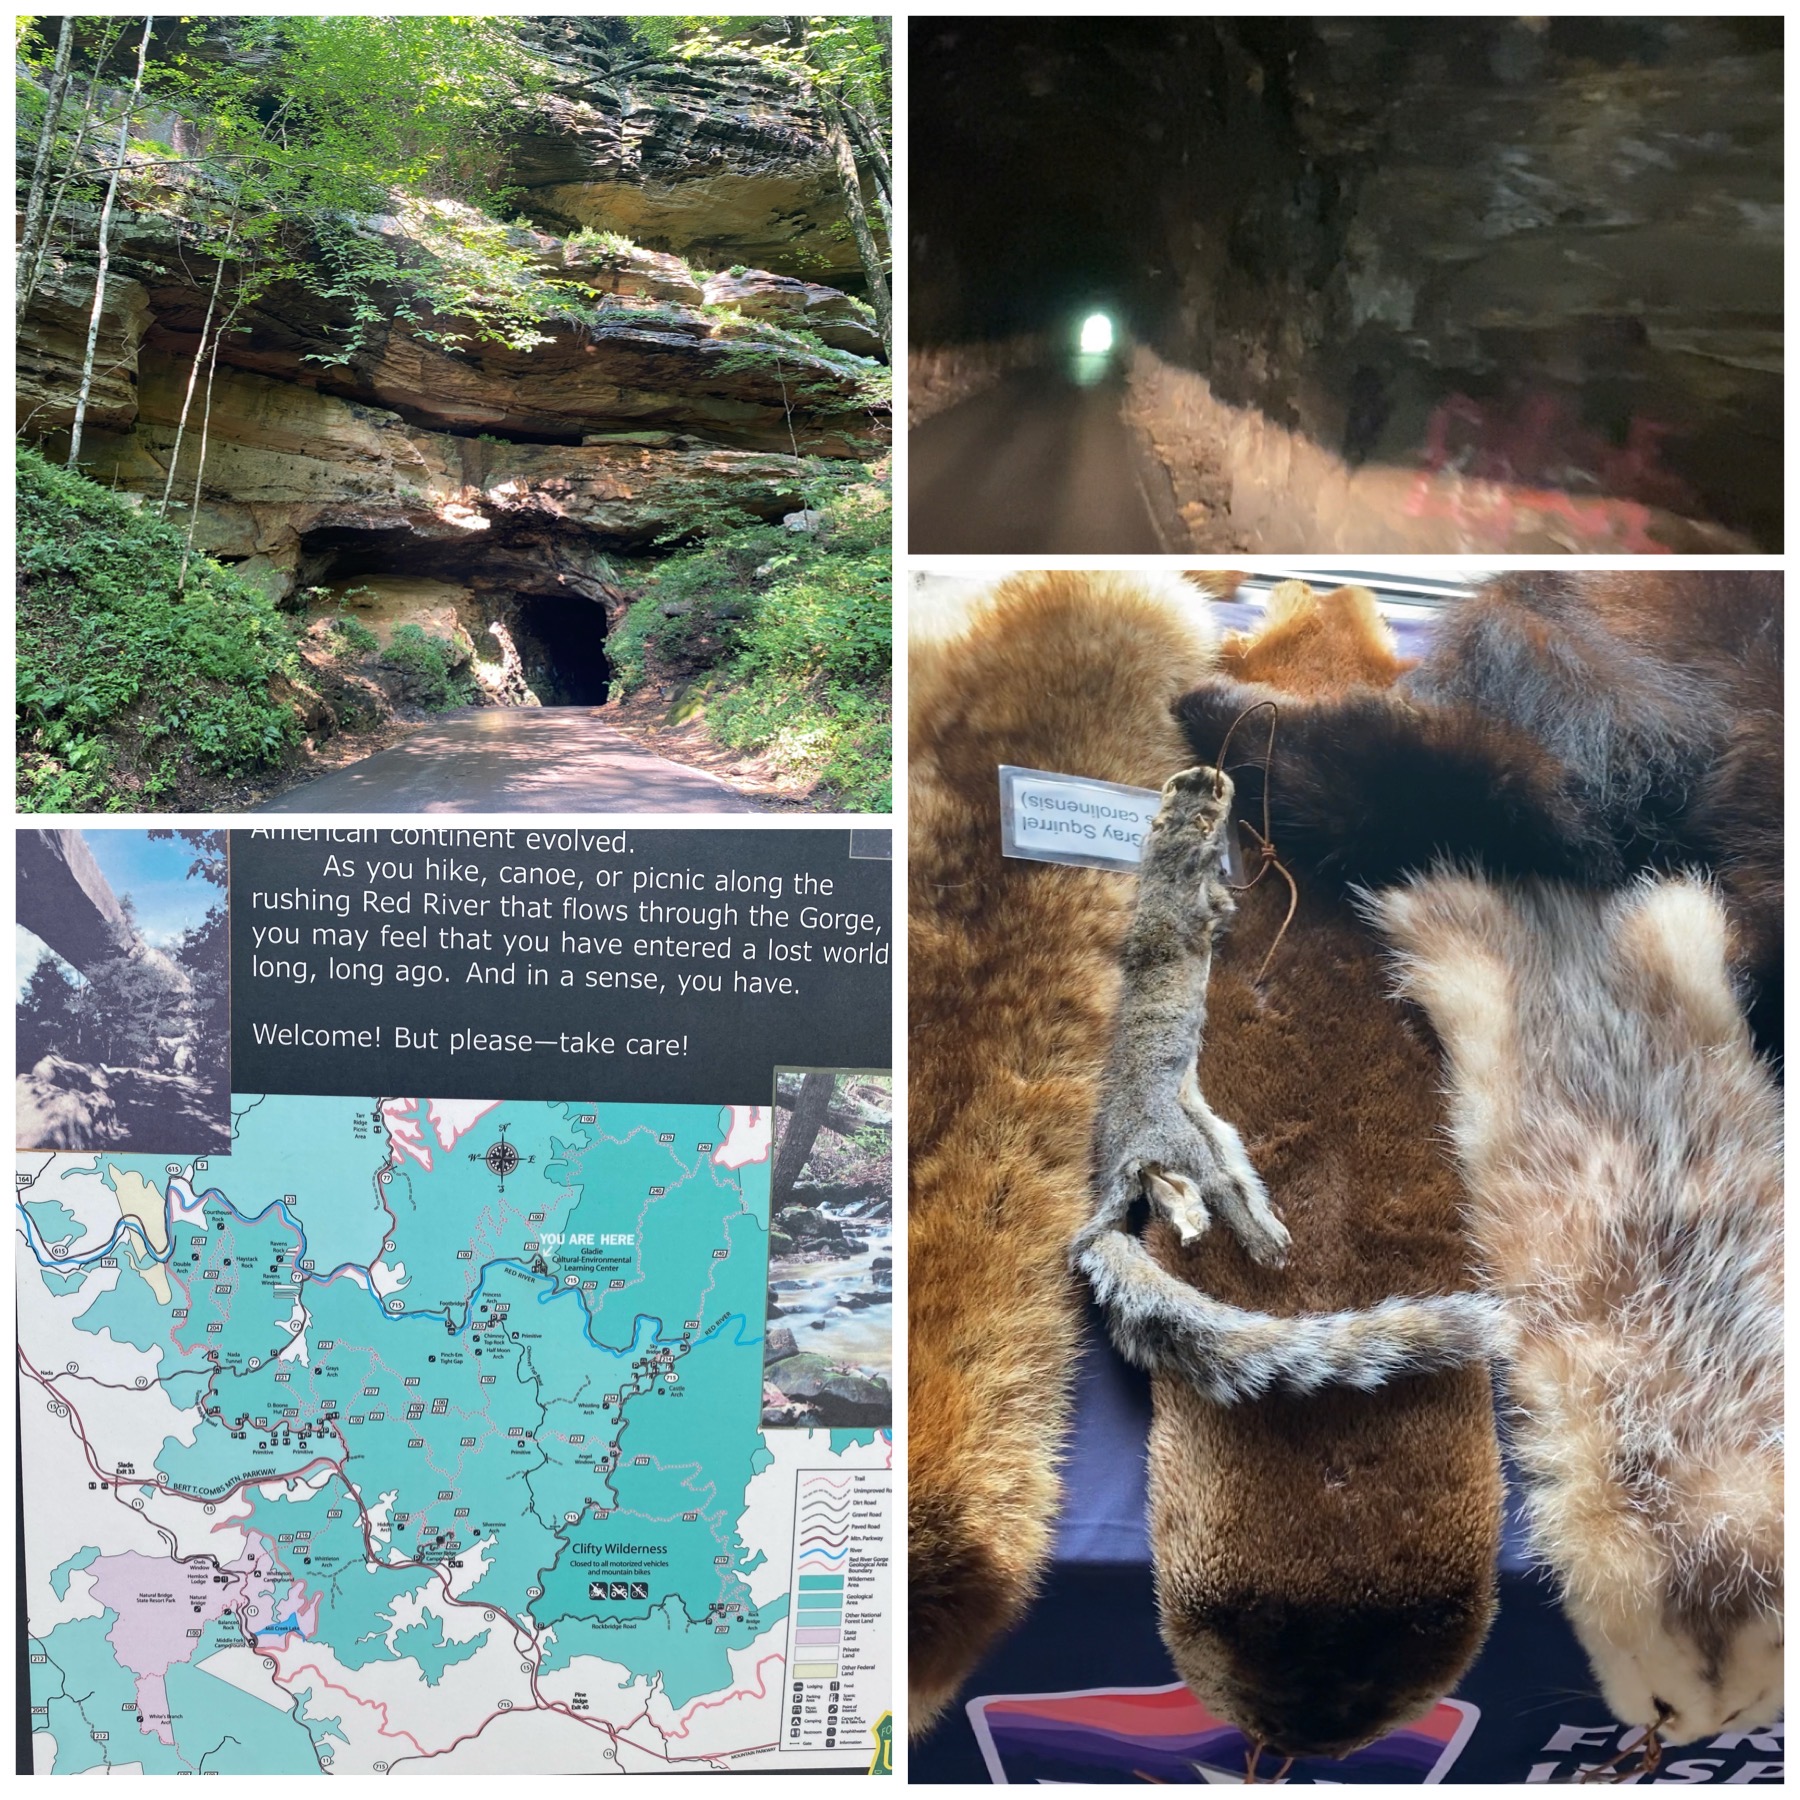
Our first day there we drove through the park. Our pathway from our cabin took us through Nada Tunnel. It was a really neat tunnel, rough-hewed, single lane, without any lights. You could see water dripping. We stopped at the Gladie Visitor Center to check out the souvenirs and to get a park map. The Visitor Center had a nice selection of souvenirs, clean restrooms, friendly staff, and fun interactive exhibits. They had different animal pelts that you could touch, as well as a video of the park.

(NOTE: Click on images to enlarge.)

Nada Tunnel

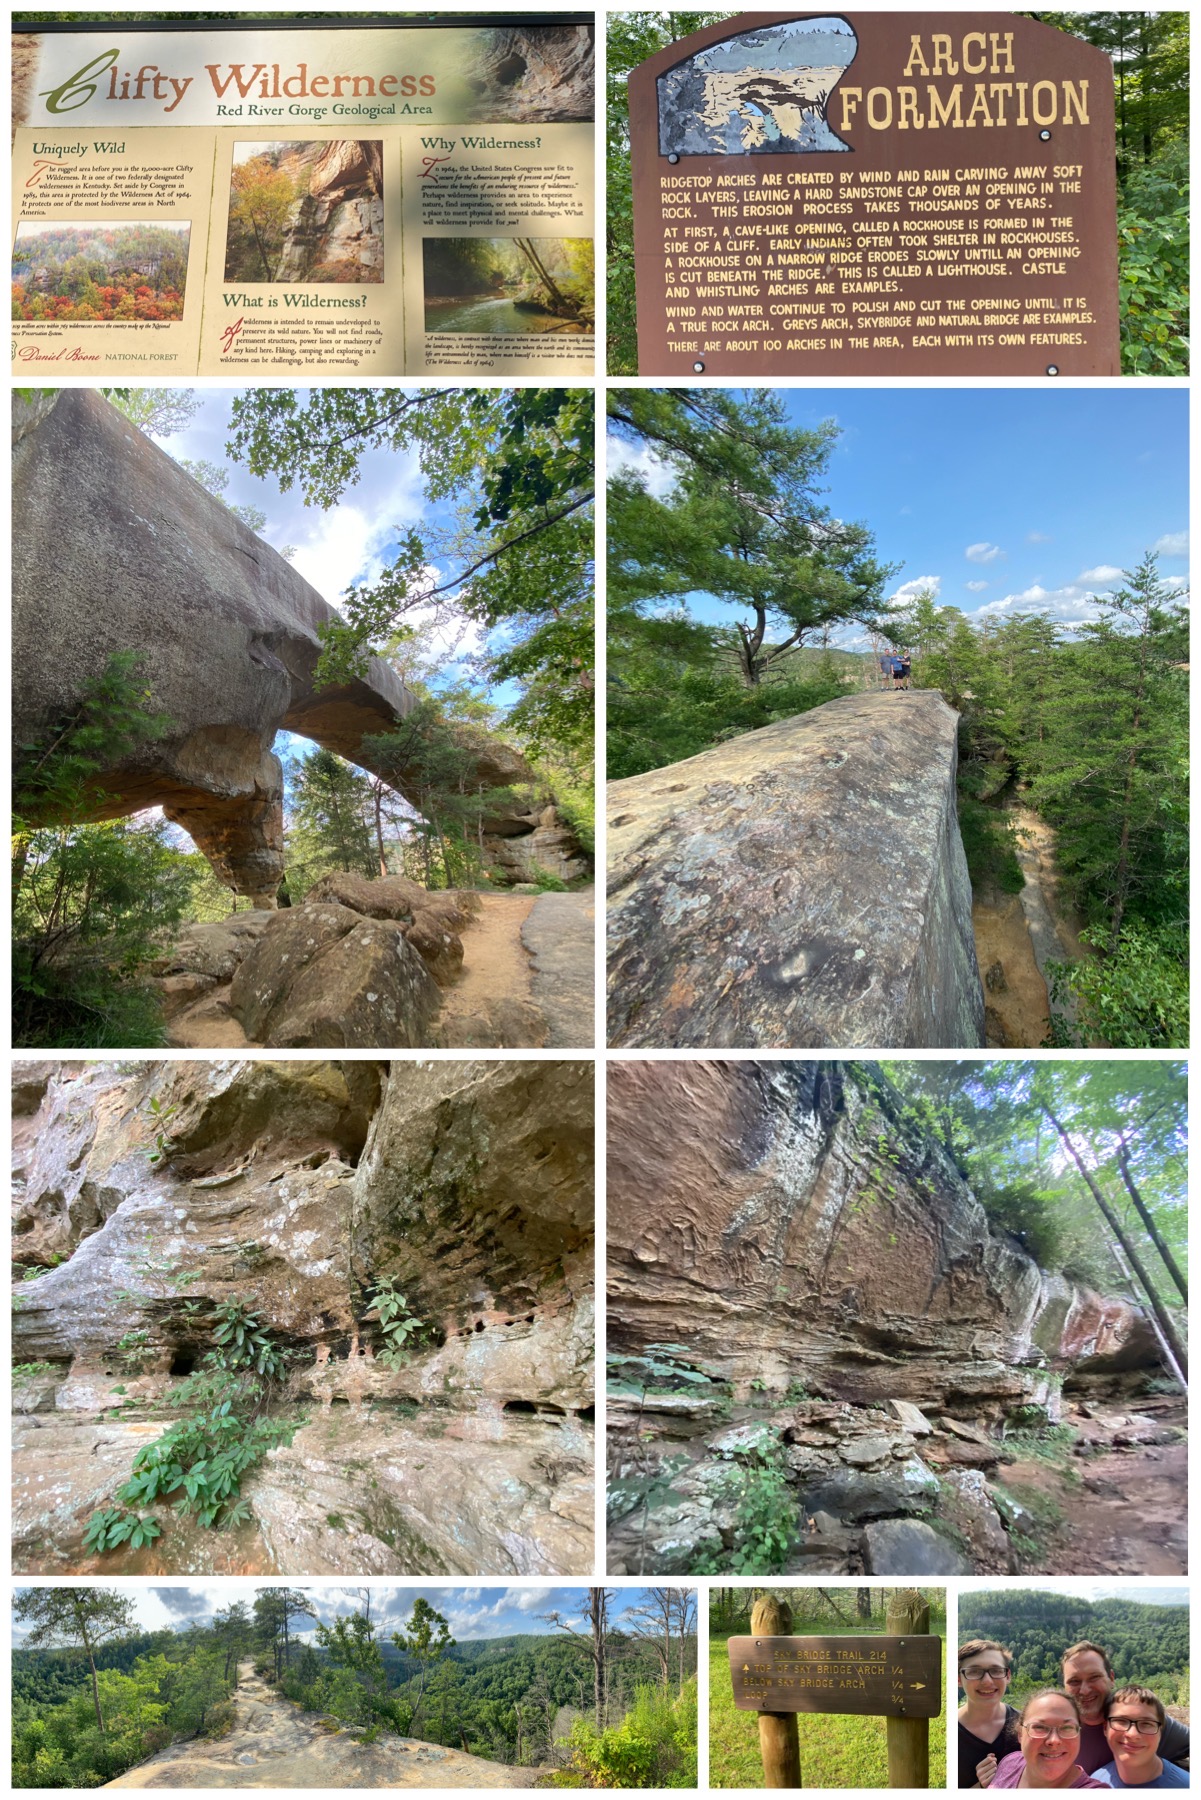
We ended up at the Sky Bridge. It was a nice little hike. It had a couple of different sets of stairs, but a clearly defined path. It was a very hot and muggy day, but there was plenty of shade along the trails. We walked across Sky Bridge and then took the path that led us underneath the bridge. It was very neat to see it from a different perspective, as when you are up top, you don’t really notice the arch shape. There were several spots that had dripping water, which made a very cool and unique sound.

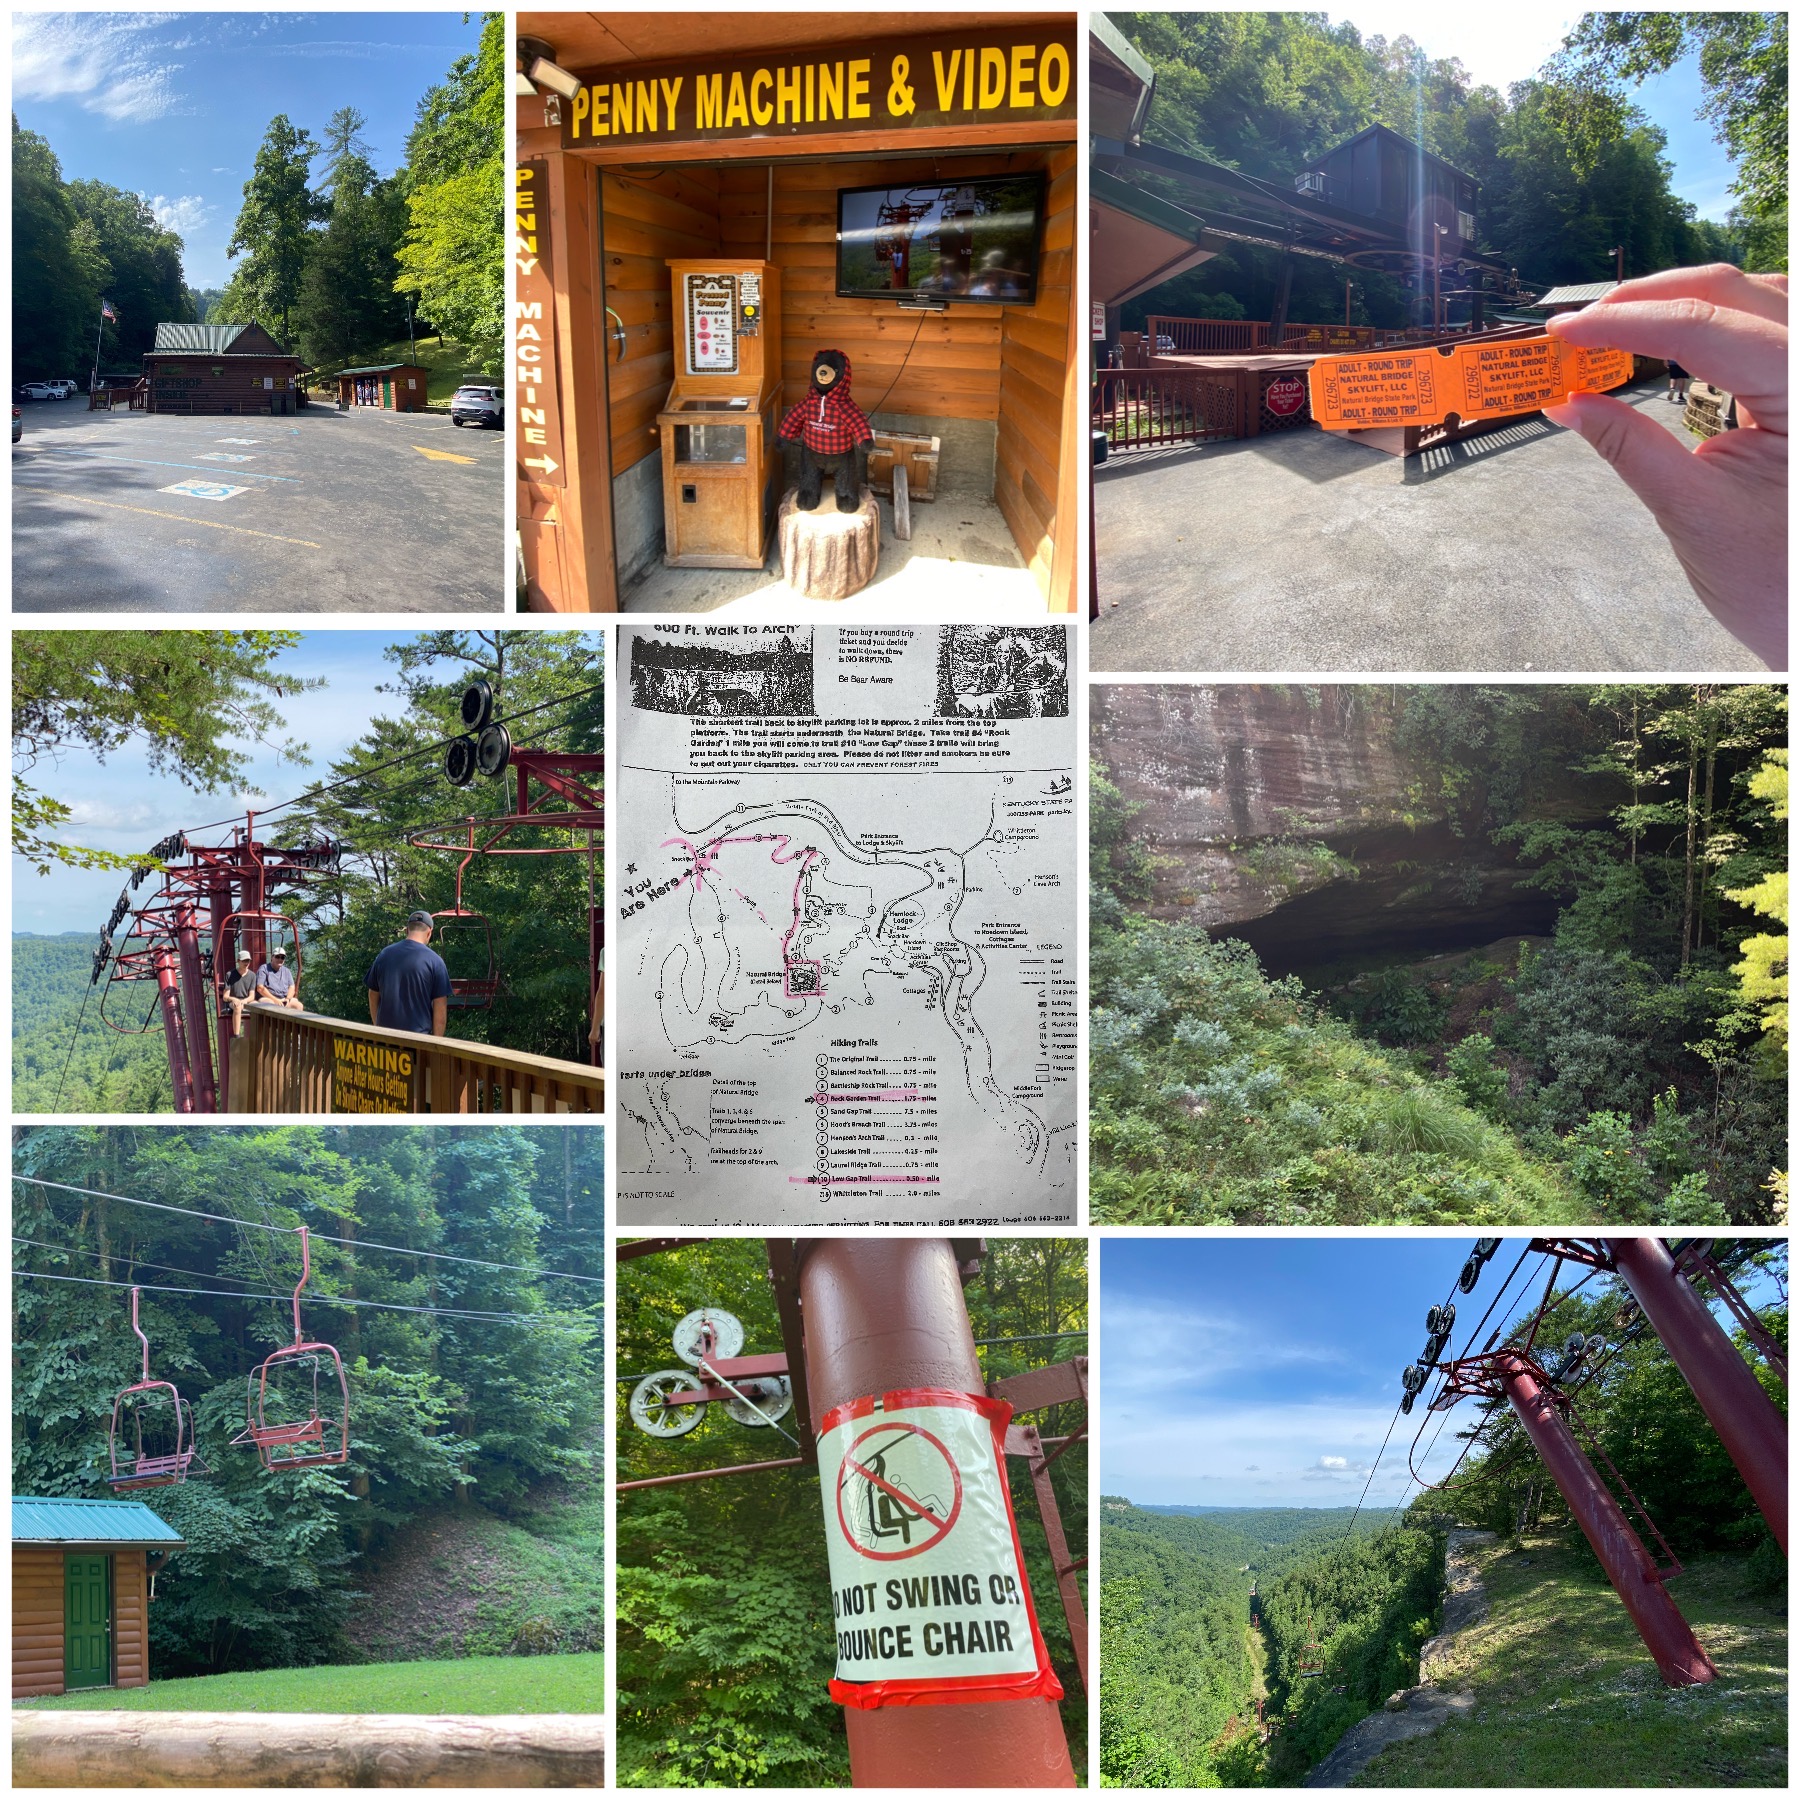
Day two of our Gorge adventure led us to the Sky Lift. It was $17 per adult for a round-trip ticket. Tickets could be bought in the gift shop. They had an interesting video and a pressed penny machine (Nick was very happy) in the outside booth. The ride up was enjoyable and we had a nice breeze. The steep uphill (or downhill for the return) can give you a jolt when you first see it). There is a nice trail nearby as well that gives you a nice overlook of the area. TIP: Secure your items! If they fall you will not get them back. Nick’s new pocket knife was lost to the wilderness as it fell out of his pocket halfway up to the top. (YouTube: link to video.)

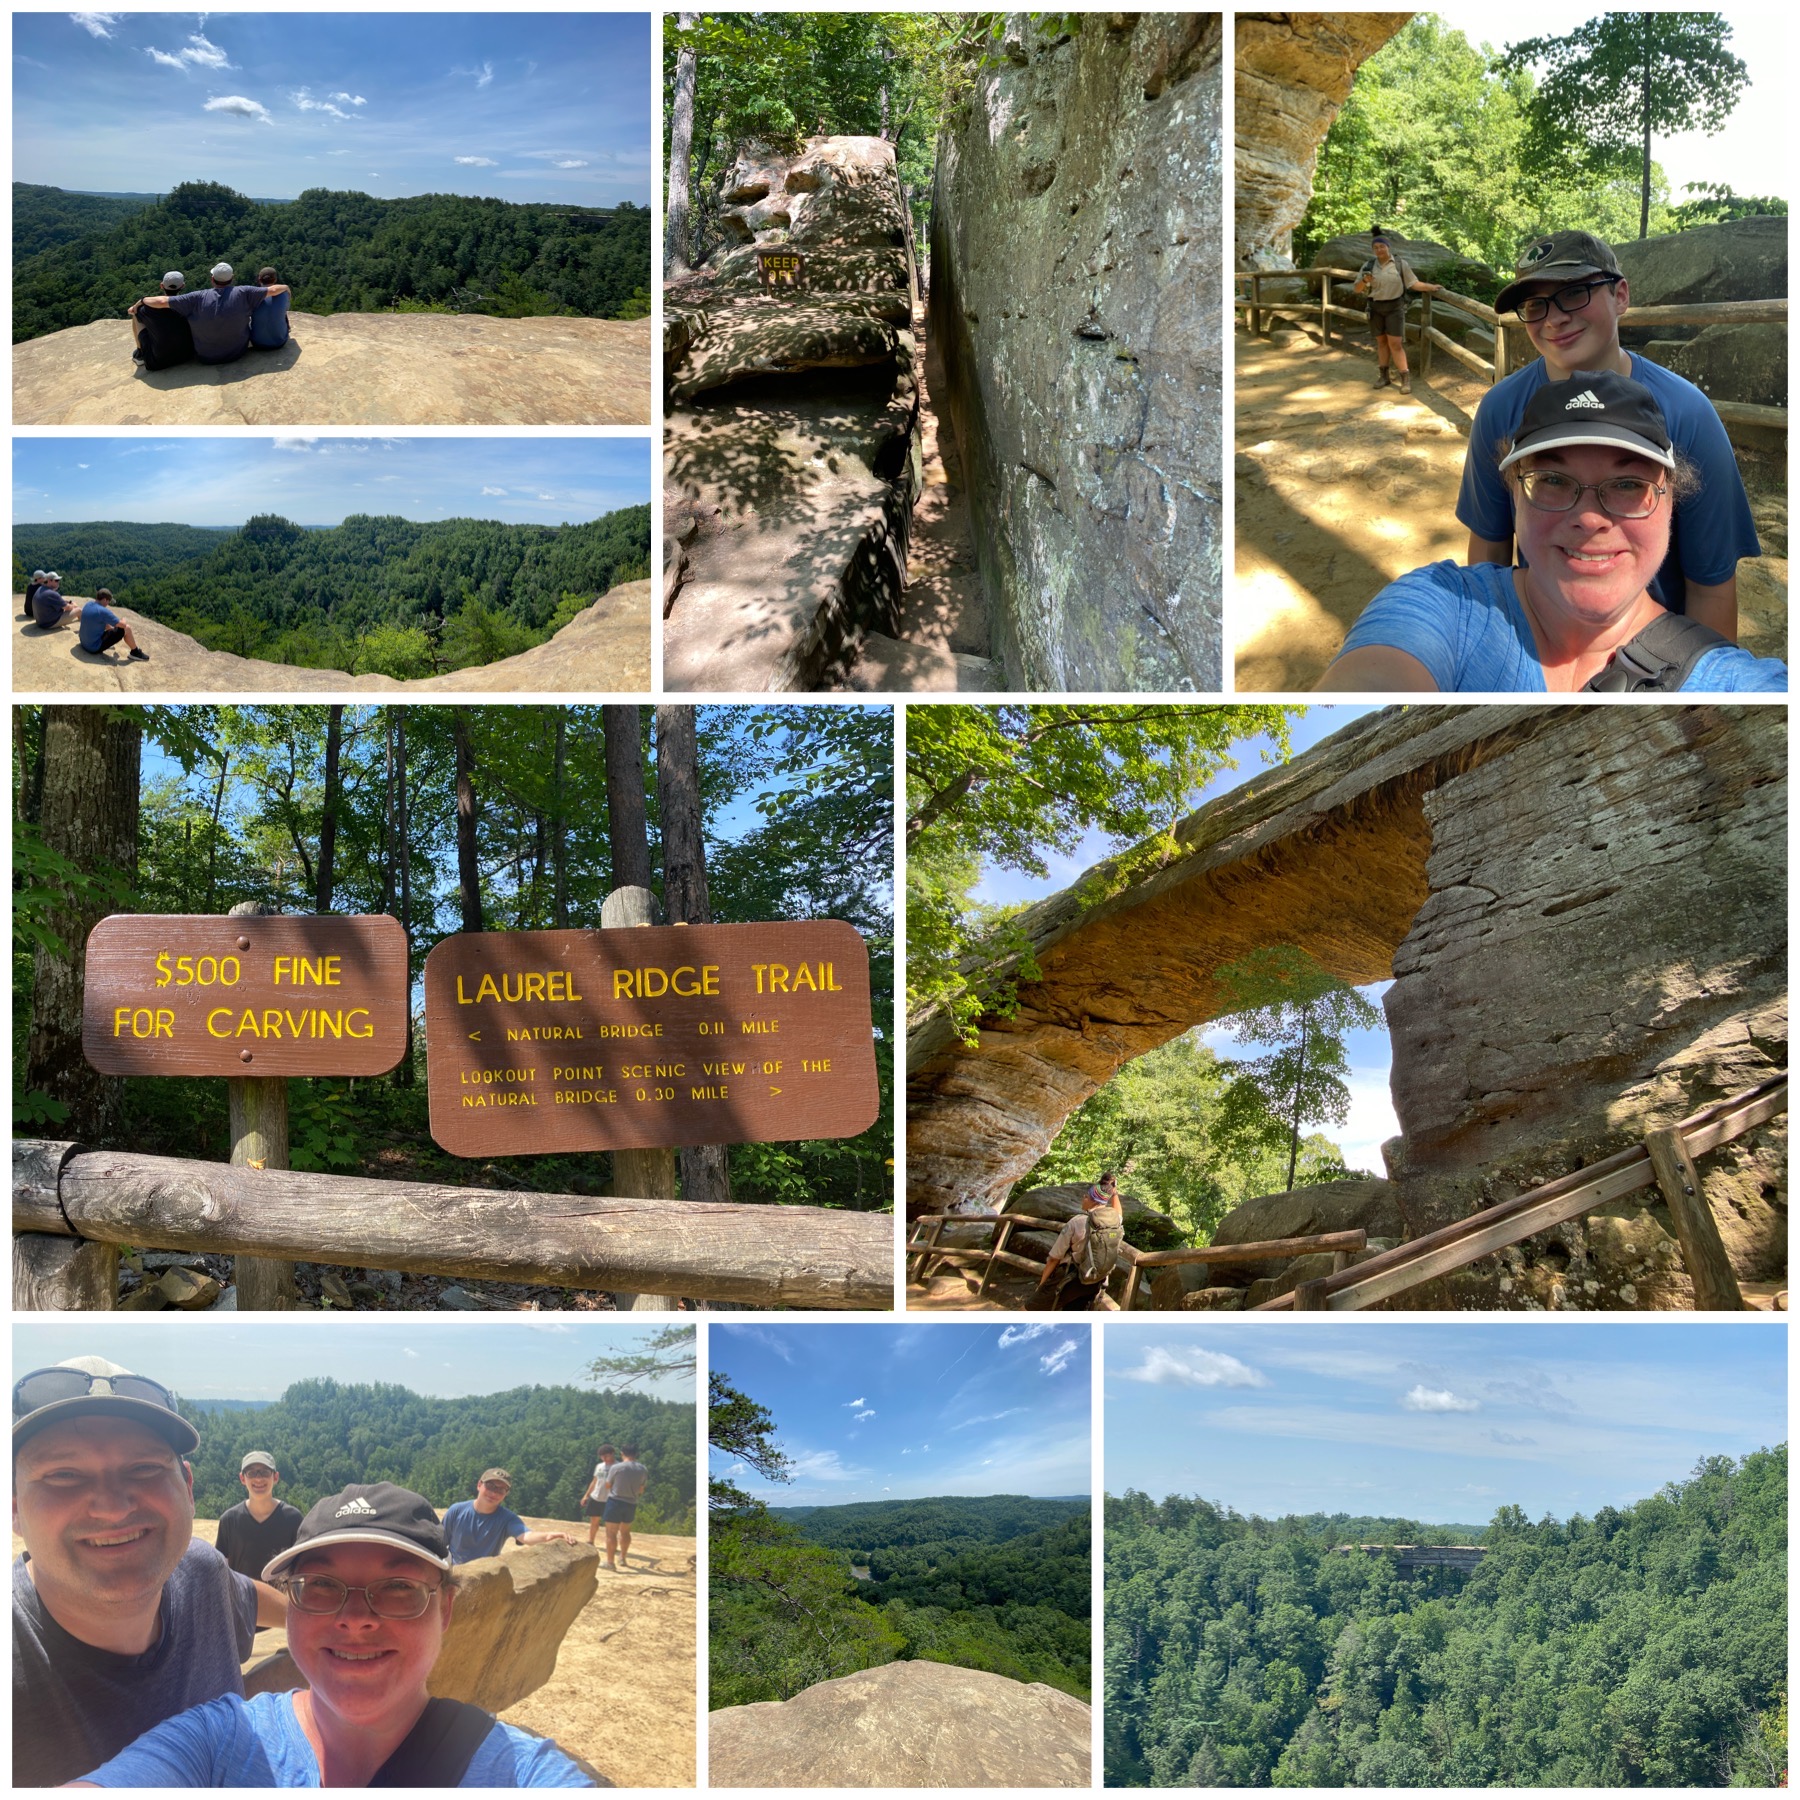
From the top of the Sky Lift, we went to see the Natural Bridge. This was also a neat bridge that you couldn’t really see well unless you were underneath it. Nick and I decided to adventure through Fat Man’s Misery, a narrow gorge in the rock that leads you to the bottom of the Natural Bridge. Ben and Will stayed behind.

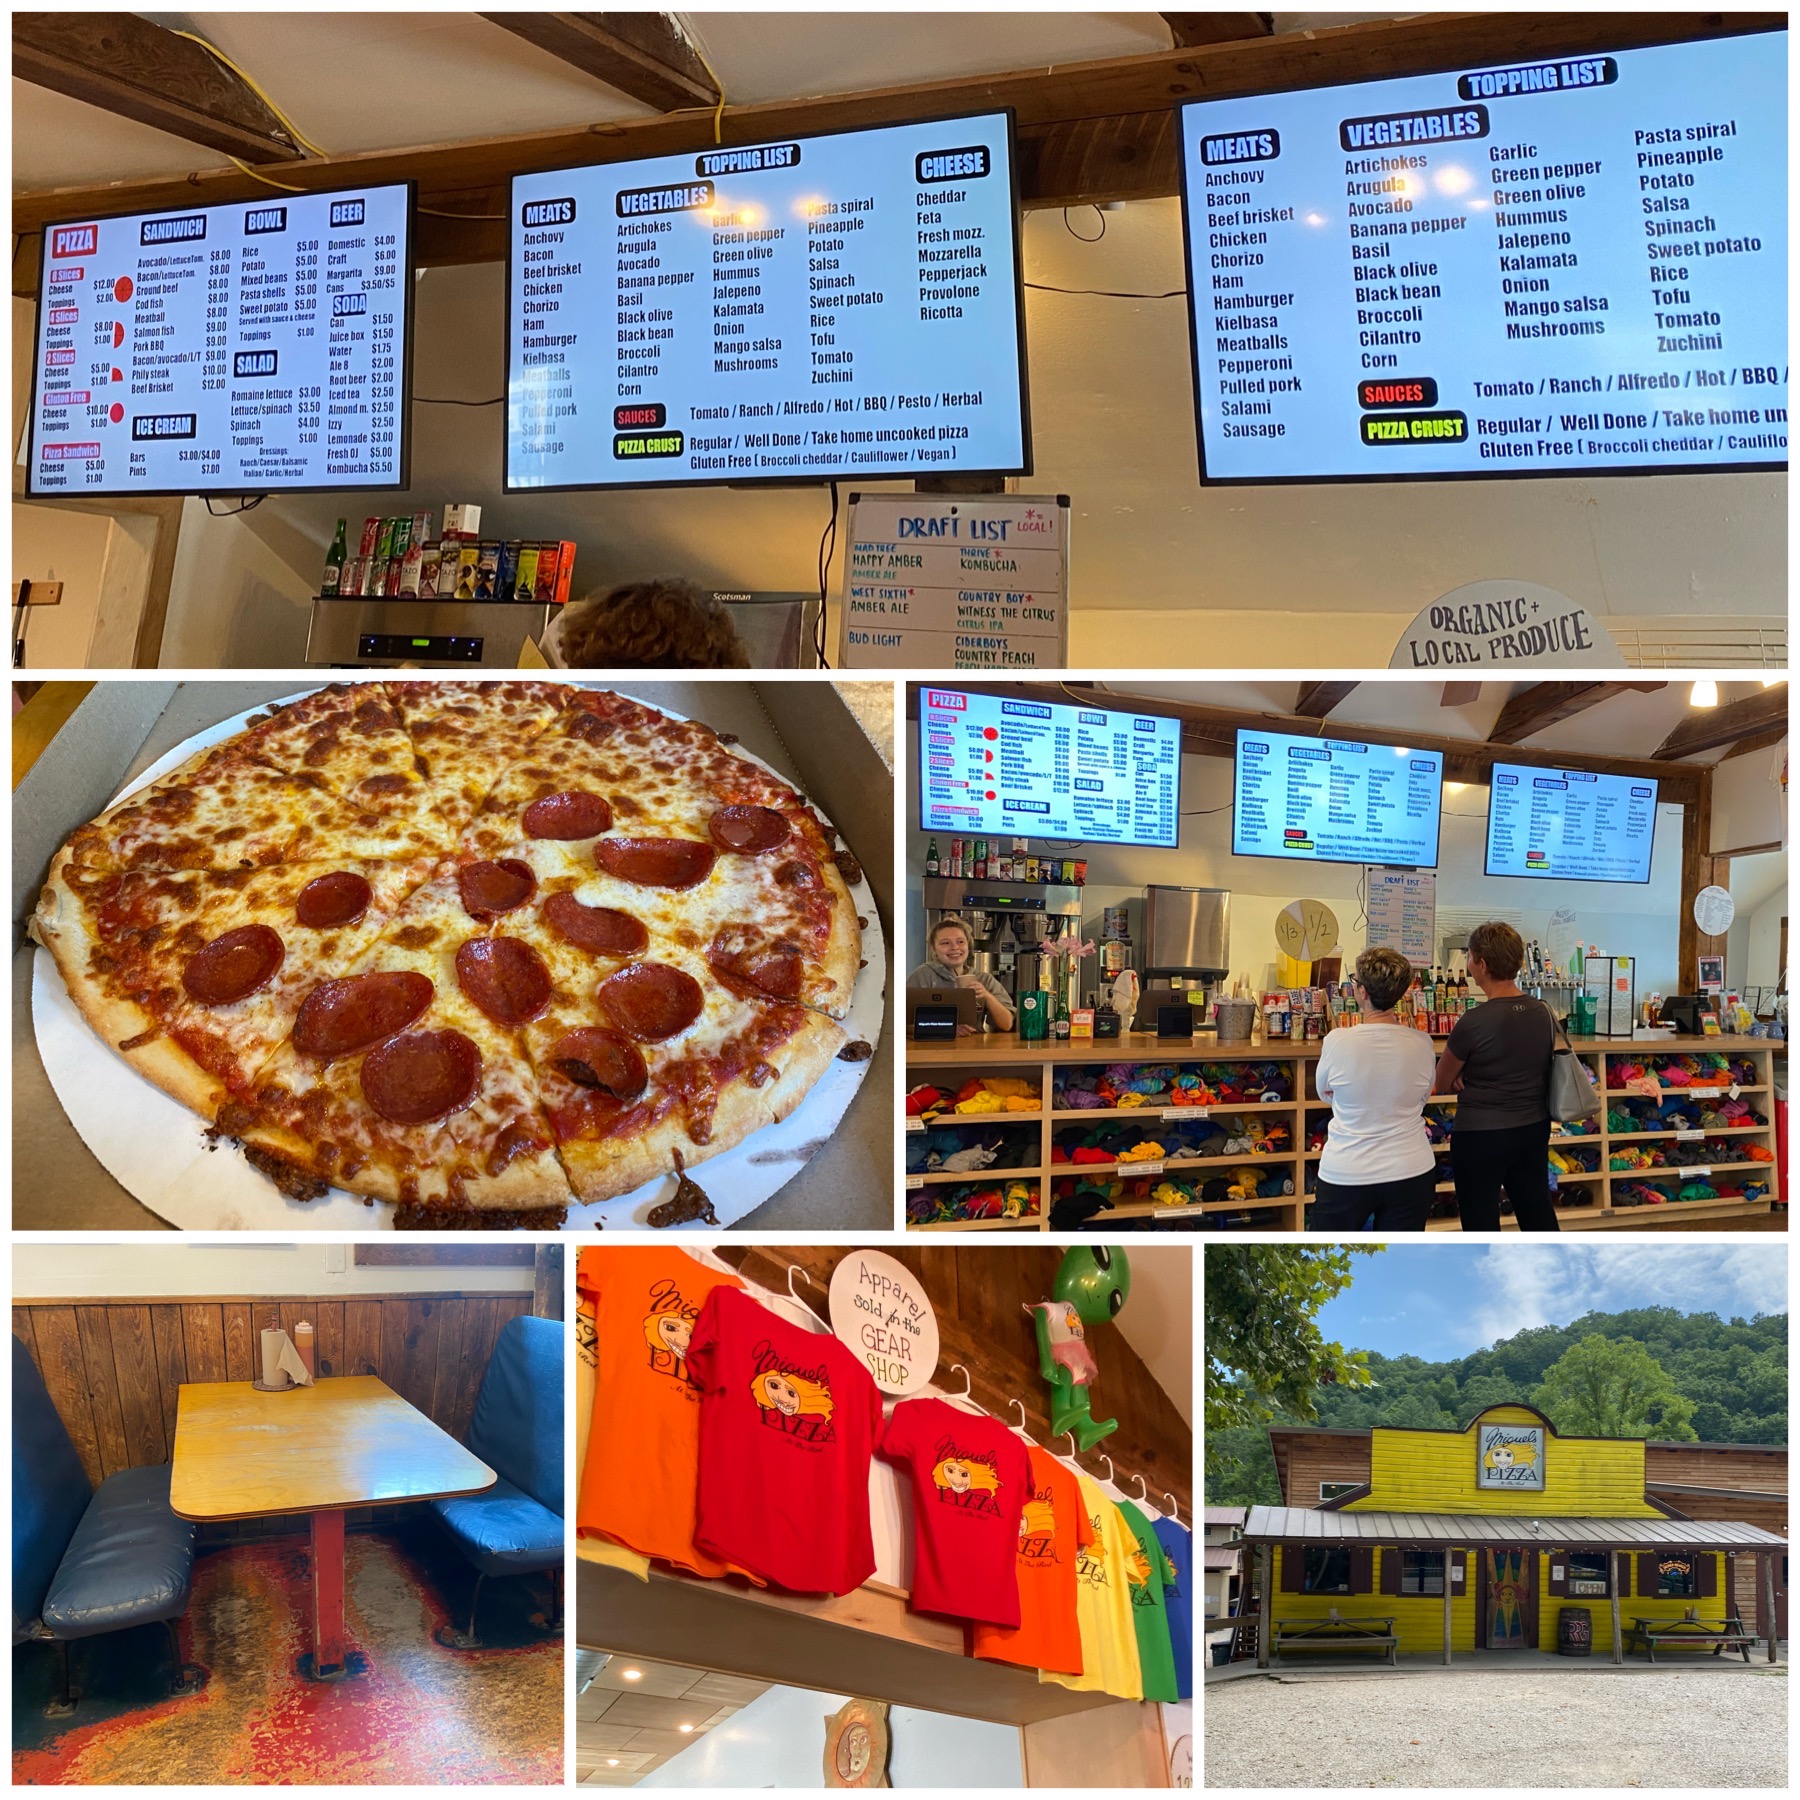
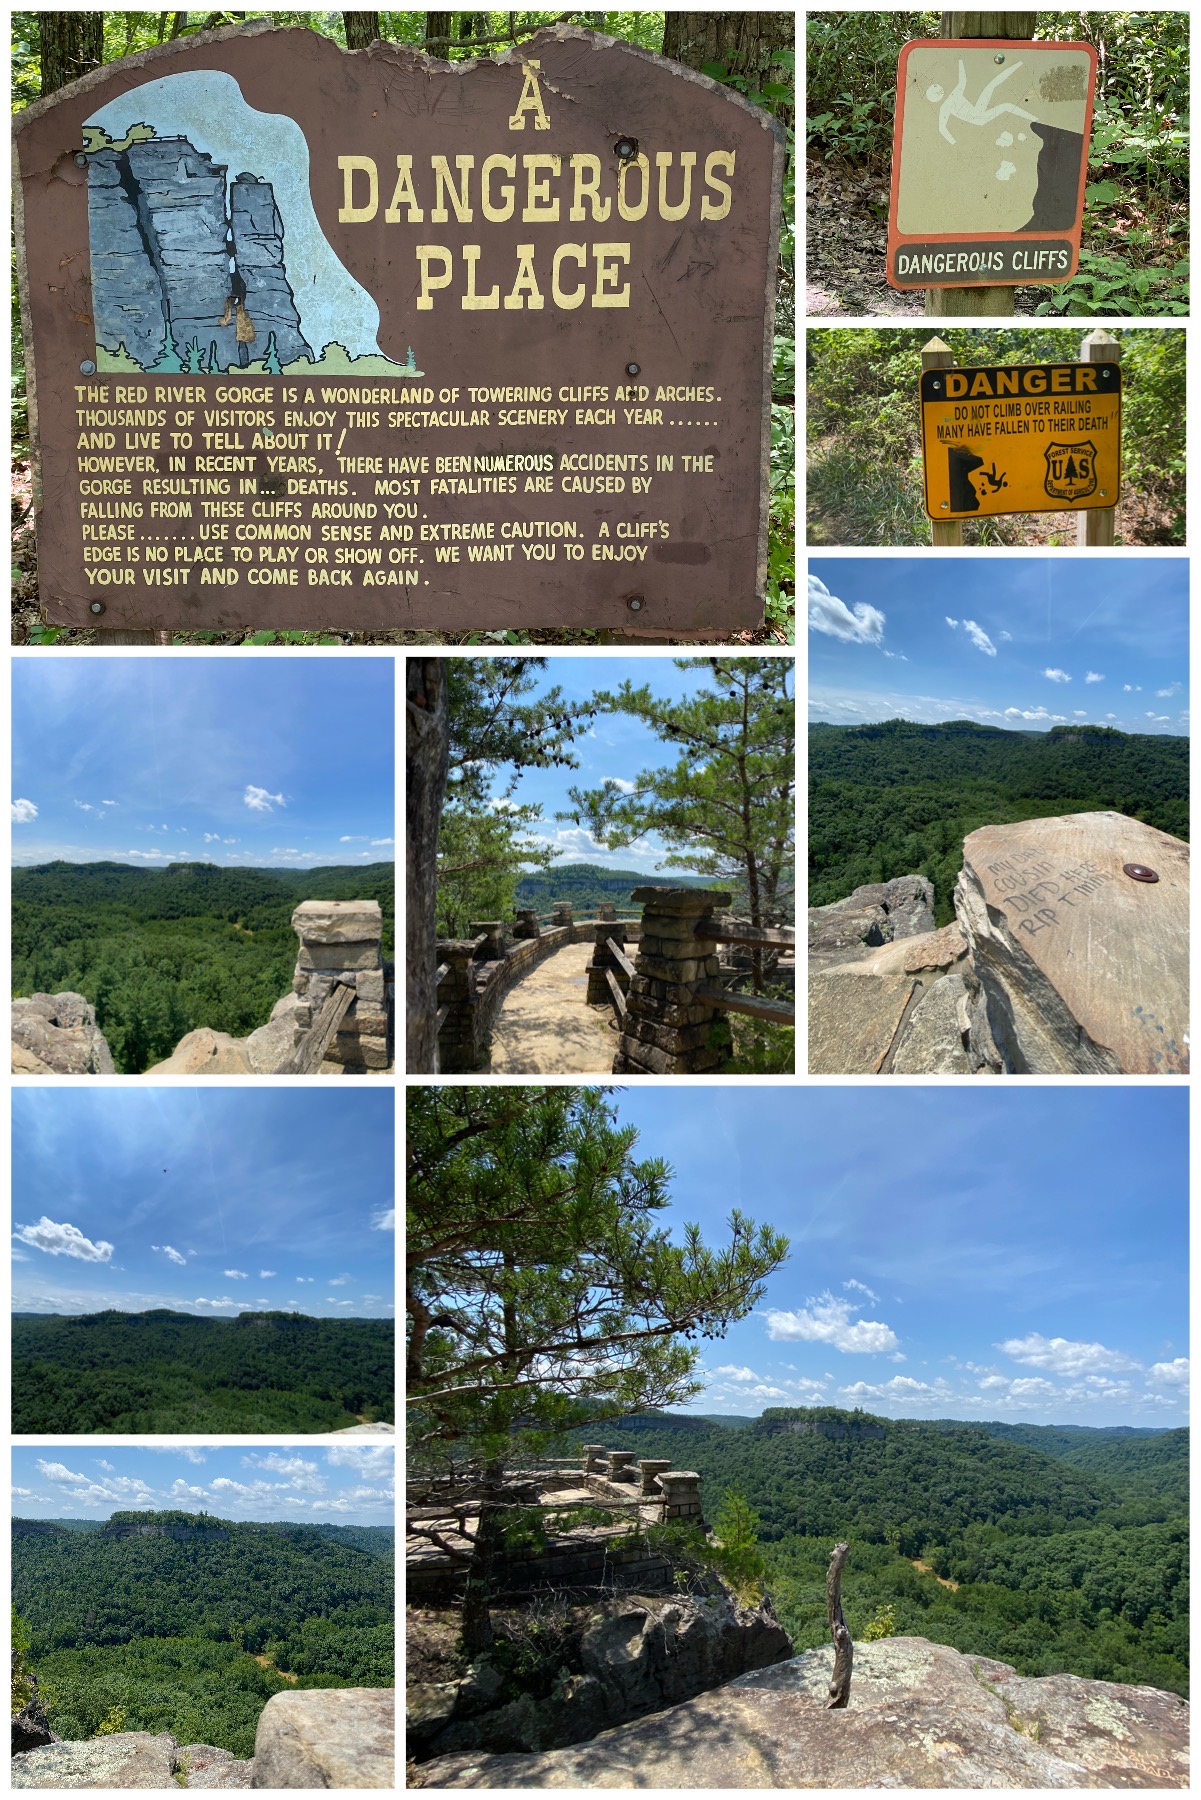
We stopped for some pizza at Miguel’s before driving up to Chimney Top for a picnic. The pizza was really good and they had so many different topping options! (Thank you for the recommendation, Mindy!) I froze when presented with so many options and went with a really boring pizza, but it all looked delicious as it came out. After lunch, we took another short hike and really enjoyed the views. There were several caution signs about not getting close to the edges. We watched the river and a hawk floating on the breeze.

The main attractions at Red River Gorge seem to be rock climbing, kayaking, and primitive camping. Due to Will’s restrictions from surgery this summer, we kept to the easier trails. It was pretty empty, as we were late in the summer vacation season. Compared to some other places we have been to, it was tough to tell it was a gorge due to the abundance of trees and other plants. It must be gorgeous in the fall. I’m glad we went, but as we are not rock climbers or really even kayakers, I don’t know that we would go back.

Red River Gorge Rating: 2/5 hitches (For us. If you love rock climbing and kayaking, I’m sure it would be amazing!)

Posted in: Exploring Virginia, Sightseeing, YouTube Video Link

Driving The Chesapeake Bay Bridge Tunnel

There wasn’t much of an option to get from Williamsburg, Virginia to our next campground, other than the Chesapeake Bay Bridge Tunnel. Because we were towing the RV, it cost us $24 to cross. The bridge goes above water, but also dips under the Bay a few times to allow for ship passage.

We were later told that this bridge is considered to be pretty scary by a lot of people. We were fine on the bridge, luckily there wasn’t any wind. We had already gone across the Pontchartrain Causeway, so the lack of seeing land didn’t really bother us. We had also driven over the Talmadge Memorial Bridge in Savannah and the Arthur Ravenel Jr Bridge in Charleston, both of which are tall enough for the cargo ships to pass under (185′ and 186′ clearance below the bridge to the water). The Chesapeake was only 40 to 75 feet of clearance, so the height didn’t really bother us either. (Pontchartrain was 15 feet of clearance.)

Maps view

However, even though the tunnels are neat and make a great design for ships and cars/trucks to keep doing their own thing without stopping traffic, I am not a huge fan of being under the water especially while towing the RV. The tunnels were also a little crazy with seeing how close the tops of the semi-trucks came to the top (some only had about a foot of clearance). Now, a few days later a rain storm came through and there was a wind warning out for the bridge, so I am very glad we were not on it then.

NOTE: These are the discount prices. If you do not have an E-ZPass, it will be $14 each way!

VIDEO: Driving The Chesapeake Bay Bridge Tunnel

Bridge Stats
Posted in: Exploring Utah, National Park, National Parks, Sightseeing

Zion Adventures: A Tunnel And A Mesa

Zion is only 25-35 minutes away from our campground. We couldn’t get Zion Shuttle passes for our first couple of days there. In Zion during the main season, you need to park at the Visitor Center and take a shuttle along the Scenic Drive, the main road through the park. The shuttle passes have to be bought ($1/each) on recreation.gov. They go on sale each morning at 9:00 am MT for the next day. The morning and early afternoon passes go super fast, so get on right away to get the best time. If you are going in October, they are sold a little more in advance according to the website.

However, there is another way to see Zion if you can’t get passes right away! If you enter on the South Entrance, you enter through the Park Gates (they do check for passes/admission), and come to a split in the road. One goes to Scenic Drive (shuttle only right now) and the other goes on to the Zion-Mt. Caramel Highway, which you can drive on in your own vehicle. (If you enter on the East Entrance, you also pass through park gates and are already on this road. I believe it is also State Route 9.) You can find several trails and parking pull-outs along the road. You also drive through an awesome tunnel made in 1930. It is a mile long with windows cut out of the mountain. The windows were created for air, but also offer nice scenic views as you drive by. There are height restrictions though.

About the tunnel. You can see one of the windows in the mountain side.

The drive is worth it just for this tunnel! 🙂 There is another smaller tunnel along the road as well.

On the other side of the tunnel, you will find various trails and pull-outs. The landscape is really neat. The rock looks like it is layered. Ben called is phyllo dough rock, which is what it looked like!

We stopped at a pull-out to look at Checkerboard Mesa, which Will had just learned about in class! There was also someone painting in the parking lot.

It was towards the end of the day, so we didn’t do any hiking, but I did find a trail there that I want to do before we leave.

~Sarah

Back to Top